Tips and Tutorials:
Planning:
Good planning can assist in making the desired green screen effect believable. The beauty of a green screen is that you can pretty much set it up anywhere, as long as there is at least six feet between the interviewee and the backdrop. Your goal should be to “put” the talent in a virtual environment that looks realistic and is appropriate.
Whenever possible, choosing an InstaBackground prior to starting production will allow you to plan your lighting design accordingly. You may even consider bringing a hard-copy of the background you intend to use with you to the shoot so you have it for reference. Another option is to visit our website while you're on-location and call up full-screen samples on your iPad or other mobile device.
The main reason you want your background finalized before shooting is so that you can match the lighting on your talent to that of your background. Or vice versa. You want the viewer to believe that this person belongs in this environment and that they don't look out of place.
Everything that can be done in front of the camera should be done on set. Make sure the time allocated for post-production is used to enhance the final outcome -- instead of fixing mistakes done when shooting. Oh, and don't forget to tell your interviewees NOT to wear green.
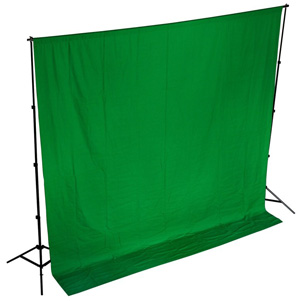 The Green Screen material:
There are many green screen products on the market, both fabric and paper, that can get the job done. However, the material being used can affect how easy it will be to get evenly lit.
Materials which are shiny can be more difficult to work with. A shiny surface will have areas that reflect the lights and create hot spots. A matte surface will diffuse the reflected light and have a more even color range.
Camera settings:
Shoot with the highest resolution your camera is capable of delivering. Even if you’re going to be editing in SD or 720P, try to capture in 1080P. The more detail you can capture, the cleaner the key you’ll be able to pull. You can always scale down, but you can’t get back image data that you haven’t captured.
You should always shoot with a progressive video format rather than interlaced, and the camera's shutter speed should be set to 1/60th for 30P and 24P, or 1/50th for 25P.
Most InstaBackgrounds are designed to be used with interviews that are shot with long focal lengths -- just like you'd use when shooting a normal interview without a green screen. You should allow at least 6 feet between the talent and the green screen; and then the camera should be at least 8-10 feet from the talent. Warning: The use of wide angle lens will probably not result in satisfactory results.
Whenever possible, you should choose a white balance and and lighting style that will closely resemble the environment of the InstaBackground you will be using. Or you can approach it from the opposite direction and adjust the InstaBackground in post so that it matches the interview. Either way is valid, as long as the results look good
Lighting & Exposure:
InstaBackgrounds are designed to work with many different styles of lighting; but one key to getting a successful shot is to match the lighting on your talent to the style of the InstaBackground that you’ve selected. Nothing screams fake as much as having the wrong lighting.
So, whether you choose the background first or you shoot the interview first, care must be taken to make sure they're a good match .The trick to selling the effect to the audience is to match the light on your talent to the light of the InstaBackground plate.
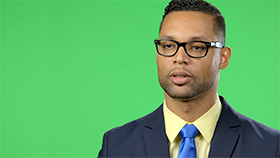
Light the green screen evenly . . . then set your camera to auto iris so the camera chooses the best mid-level exposure . . . turn the iris control back to manual and light your talent for that exposure. An all too common mistake is to over light the green. The green just needs to be green, not bright green. In other words, the green background should be darker than the talent.
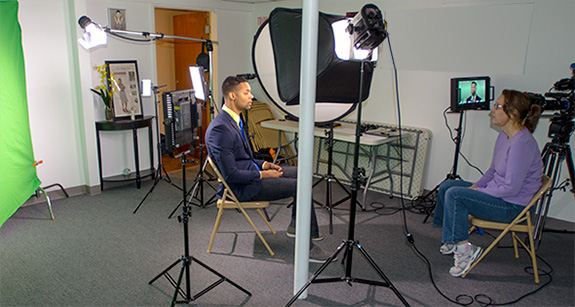
 Set the talent as far away from the chroma screen as possible. 6-8 feet should be considered the absolute minimum. Keep in mind that the the chroma key background does not have to fill the frame because you can add a garbage matte in post to clean it up. But it is very important that the green screen cover all of the background behind the talent -- including any areas where they may move their hands or arms.
Light your subject with traditional three-point lighting and pay special attention to creating a nice rim light from the back to help offset the subject from the background. The background you've chosen will also determine the placement of a back light and kicker -- or whether or not you even need either of them.
Framing and Composition:
If talent is supposed to be looking at an interviewer off-camera, make sure they have something, or someone, to look at and interact with during the shooting. 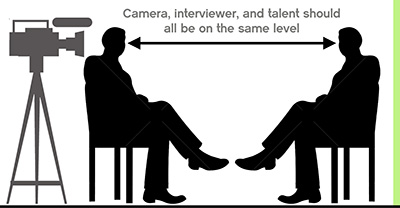
Most InstaBackgrounds are designed to be shot with a level camera at the same height as the talent’s eyes. In other words, if the camera is looking up or down at the talent, then the perspective may not appear right.
Don't be afraid to cut-off the top of the talent's head when shooting them against the green screen if that is the framing you'll want to have in the final composition. Remember, you might be able to slide the talent to the right or left in post, but you probably will not be able to adjust the vertical composition.
If your talent is supposed to be outdoors, it might be easiest to shoot them against a green screen outdoors. All of the outdoor examples you see on our website were shot in the parking lot outside our studio with no extra lighting.
Post Production
If you've got good lighting and chosen an InstaBackground that matches the look of the interview, putting them together in post should be no problem.
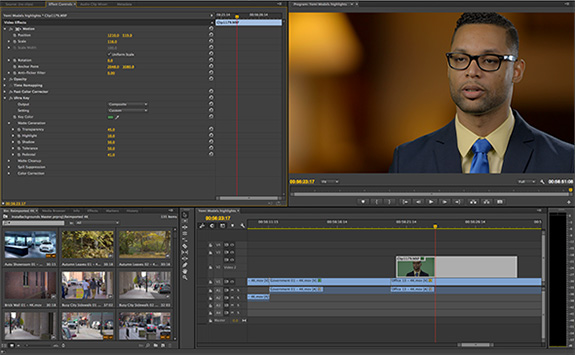
We use Adobe Premiere CC as our choice of NLE, but InstaBackgrounds are also compatible with Avid, Final Cut Pro, Edius, Vegas, and other professional editing platforms.
For the examples you see on our website and demo video we used the Ultra Key plug-in that comes standard with Adobe Premiere. Any shots that required contrast adjustments or color correction were done with Premiere's Fast Color Corrector plug-in. No extra 3rd-party plug-ins or other software was used to create our examples.
If you're editing on a 1080P timeline, you can manipulate the scaling of 4K InstaBackgrounds to change the framing. As long as you don't zoom-in more than 200% the picture quality will be perfect.
Free online Chroma Key Tutorial videos and in-depth training:
Basic Green Screen Tutorial |
||
Green Screen Tips & Tricks Tutorial |
||
How to Chroma Key in Adobe Premiere |
||
Sony Vegas Green Screen Tutorial |
||
Green Screen Video Tutorial |
||
Final Cut Pro X Green Screen Tutorial |
||
Using Chroma Key in Final Cut Pro X |
||
Lighting a Green Screen |
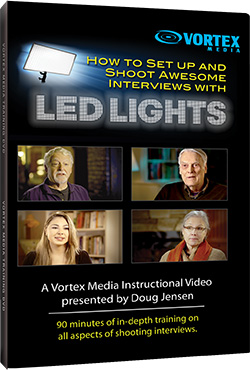
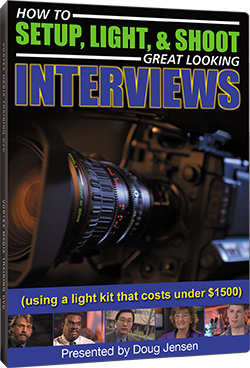
Interview Lighting Training Videos from Vortex Media:
 |
 |